Install a Container Runtime
We’ll assume you’ve installed Docker Desktop, or are comfortable enough with container technologies to adapt this tutorial for an alternative container runtime. Follow our Docker Desktop Download Guide if needed.
Declare a Platform Environment
Log in and navigate to your “Account” page (https://foundry.hl7.org/). Follow our HL7 Foundry Account Set Up guide for more information. You should see something similar to the screen shot below.

Configuring and Deploying WildFHIR
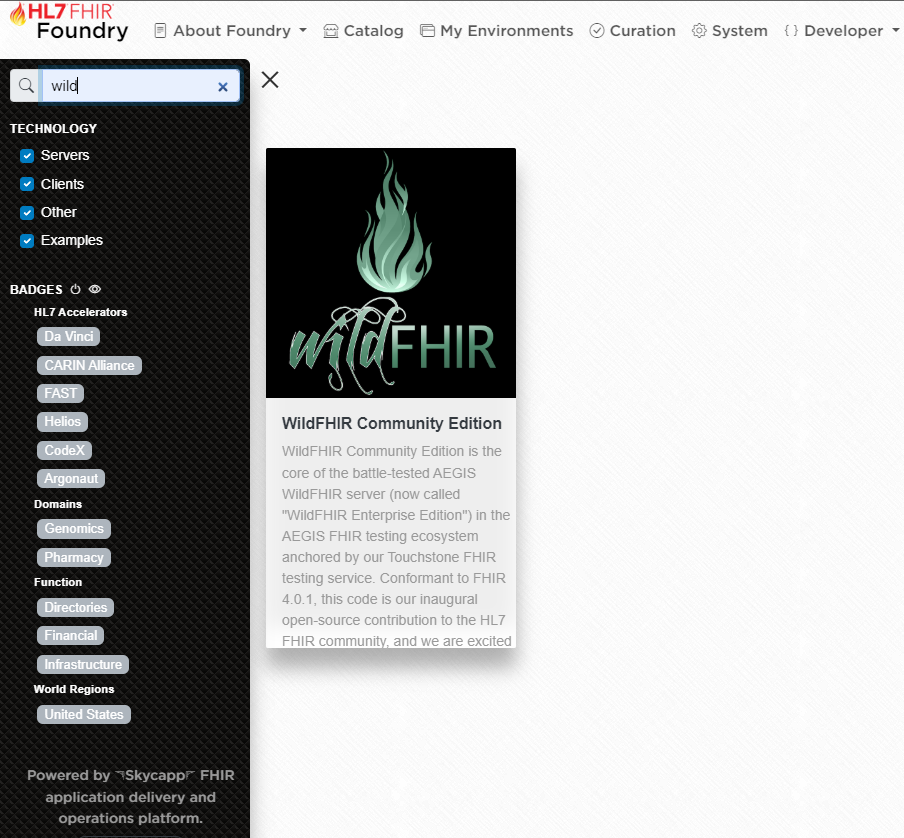
Navigate to the “Catalog” and search for “wild”. Click the product listing for WildFHIR Community Edition.
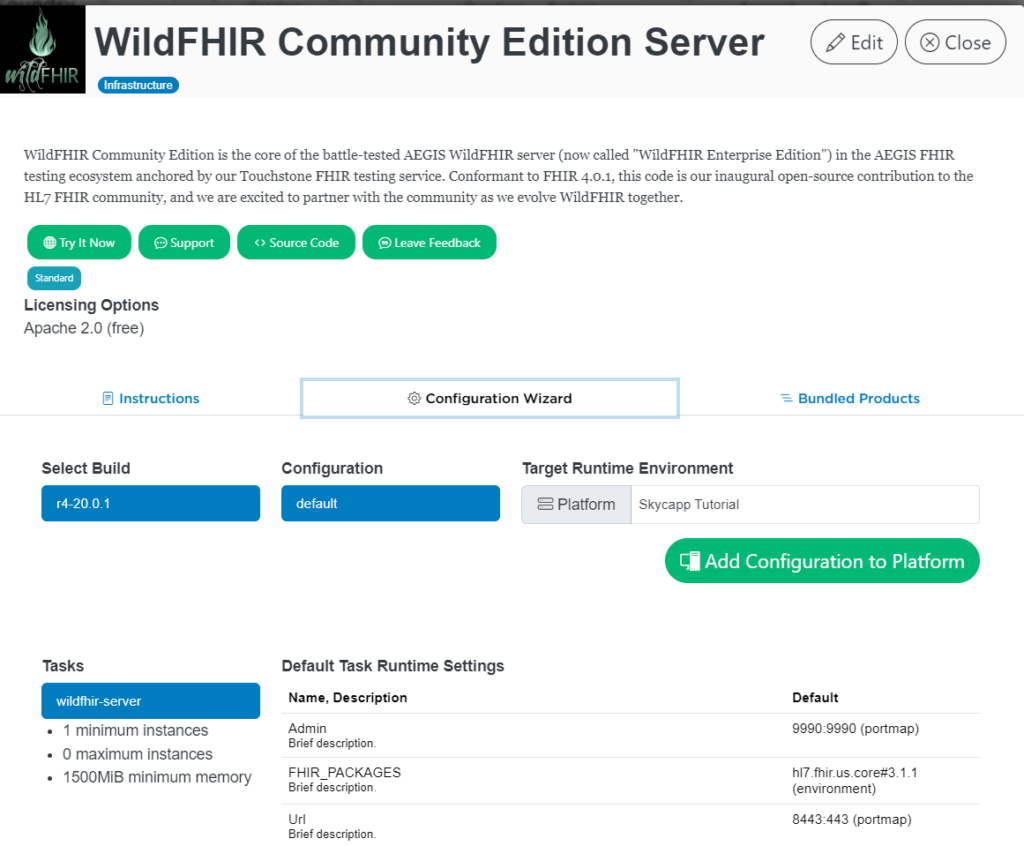
Products that have enabled distribution and deployment features will have a “Configuration Wizard” and other tabs at the bottom of the page, as shown below.
- Navigate to the “Configuration Wizard” tab
- Select the “latest” build,
- Select the “default” configuration (the default is FHIR r4 in this case),
- Select the platform environment you just created
- Click “Add Configuration to Platform”.
WildFHIR and all its underlying linked product dependencies — in this case WildFHIR MySQL — will be added to your platform configuration as “tasks”. Once you see a confirmation notice, go back to the catalog and navigate to the “My Environments” page.
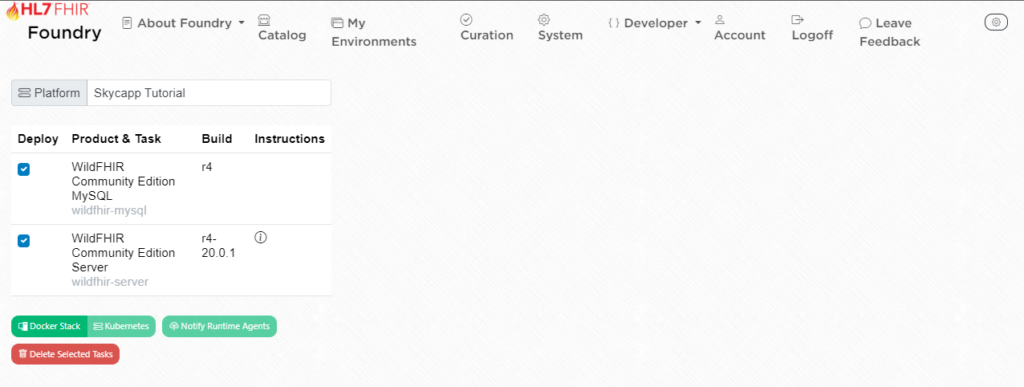
My Environments tab allows you to inspect and tweak product runtime settings prior to deployment. All fields will only affect these specific instances within the selected platform environment. They will not be saved if you remove and recreate them, nor will they be replicated to your other platform environments.
Note: If the vendor updates the software referenced by your chosen build — as is frequently the case with “evergreen” software version release tags such as “latest” — your platform settings will not be modified.
Any runtime parameters available to you are defined and implemented by the vendor, and with few exceptions are specific to the product. Consult the vendor source code, documentation and support materials for details.
Make sure all the “Deploy” check boxes are selected and click “Docker Stack” button. The system will generate and download a docker-compose.yml file. Now the real fun begins!
Go to the command line and run:
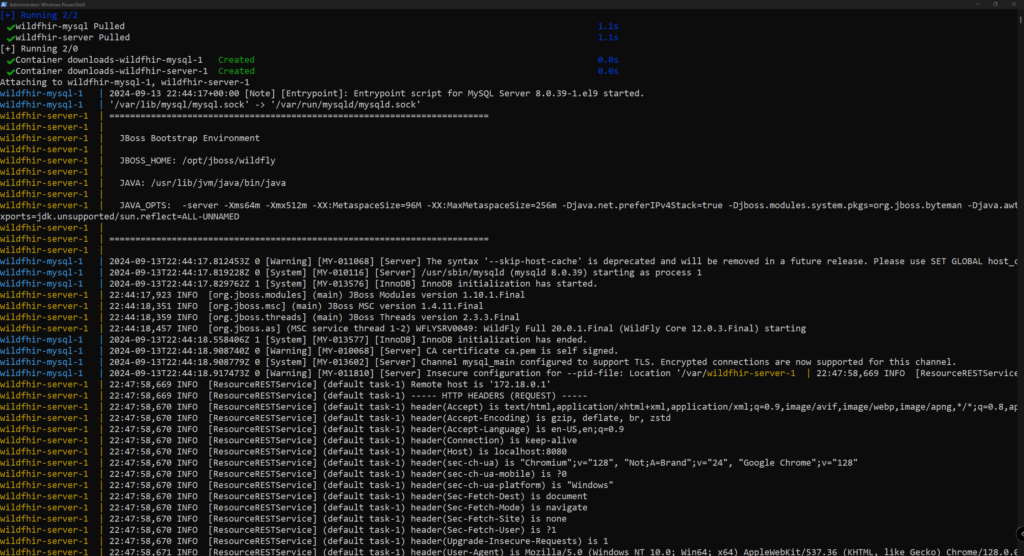
docker compose -f ~/Downloads/docker-compose.yml up --pull always --remove-orphansThe --pull always option will force checking for a more recent copy of the software version tags prior to running, while --remove-orphans will delete any abandoned containers and software-defined networks that you may have disabled since last spinning up the product stack. Both MySQL and WildFHIR should spin up and start. They may take a minute or so to fully boot.
Note: Vendors are required to provide, at minimum, images built to run on the x64 CPU architecture (AMD and Intel) with the Linux kernel. These will generally run on all Windows, macOS, and Linux operating systems as well as M-series ARM CPUs that ship with modern Apple computers, though may require adjustment of Docker Desktop settings depending on your environment. Namely, new Apple machines require Rosetta to be enabled if the product (or any of it’s bundled product dependencies) has not provided an ARM-based product build.
When fully started, WildFHIR’s web UI should now be running at http://localhost:8080 and a FHIR base URL of http://localhost:8080/r4, on top of a real MySQL database!
Manually Connecting to MySQL with the mysql Client
Find your generated network name from your downloaded .yml file, and run the following for a MySQL command line prompt:
docker run -it --rm --network <your_network_name> mysql:8 mysql -h wildfhir-mysql -u root -pNote: The password is blank. Simply press enter key.
You may now run SQL queries!