A WildFHIR Example
What is the Skycapp FHIR Stack Controller?
The Skycapp FHIR Stack Controller is a tool that allows users to reset their FHIR server by purging all existing resources and loading new FHIR bundles. Usually, these FHIR bundles will contain default server data, but users also have the ability to load custom FHIR bundles for specific preferences or testing purposes.
Skycapp FHIR Stack Controller Overview
The Skycapp FHIR Stack Controller(GitHub) provides an easy-to-use interface for managing a FHIR server. It offers the following key features:
- Display Instructions: A web UI that presents Markdown-formatted instructions.
- Load FHIR Bundles: Automate the loading of a preset sequence of FHIR bundles into the server, ensuring data is loaded in the correct order.
- Guided Resource Links: Provides a structured sequence of resource links to help users navigate and interact with the FHIR server efficiently.
- Purge Server Data: Supports bulk deletion of all resources on the server, if the driver allows. WildFHIR does support this.
The controller operates entirely within the browser, with all FHIR API interactions happening via REST calls. No server-side API calls are required.
Creating Your Own Stack Controller
The WildFHIR Stack Controller is available here. Please clone or refer to this repository as we go through the instructions.
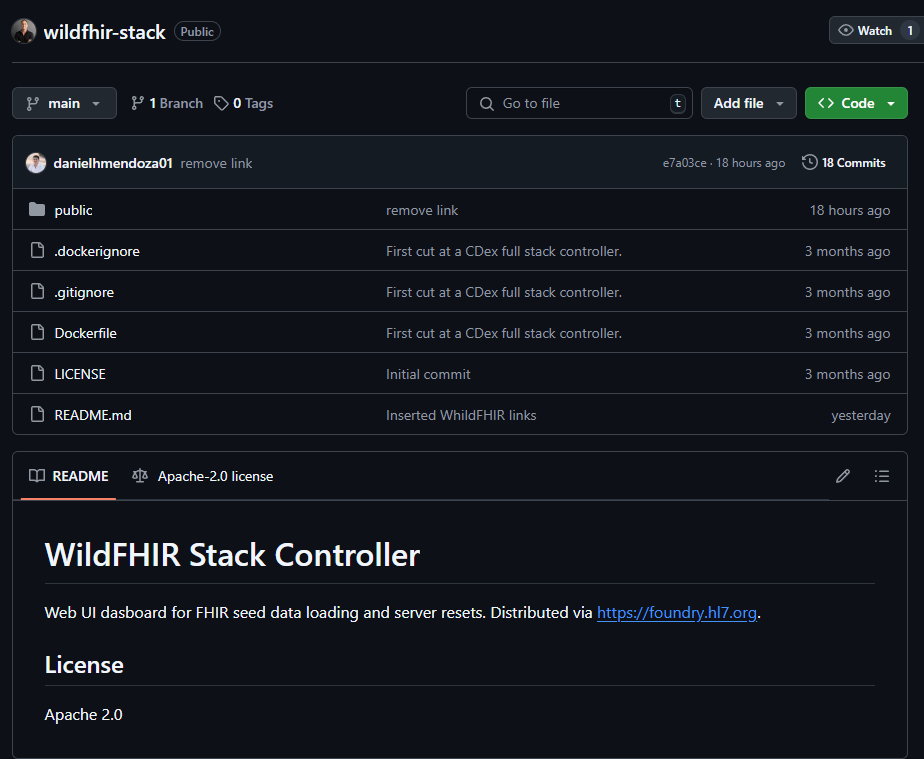
Components
You will need a folder called “public” and the Skycapp Dockerfile. The Dockerfile is available on GitHub or Dockerhub.
Your repository should look similar to the screenshot below:
Configuring and Running Your Own Stack Controller
Within the public folder you will need stack.json and any FHIR bundles you wish to load. You have two options when it comes to creating the configuration file. This tutorial will go over the first approach.
- The simple approach is to overwrite the stack.json file.
- Alternatively you can rename the stack.json file but you will have to use a url query string parmater at page load time that points to a valid alternative configuration file, such as http://localhost:4200/?url=http://localhost:4200/stack-personal.json.
First, when creating the stack.json make sure to follow the provided schema.
"$schema": "https://stack.skycapp.com/stack.schema.json",Following the schema is the title and instructions. You are able to put markdown in the instructions sections including adding pictures if needed.
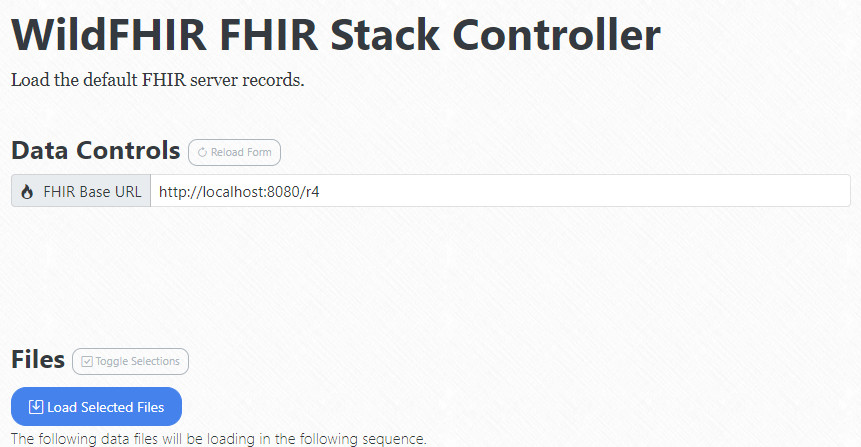
"title": "WildFHIR FHIR Stack Controller",
"instructions": "Load the default FHIR server records.",
Next will be where your FHIR server base url is and the driver. For wildFHIR it would look like this.
"fhir_base_url": "http://localhost:8080/r4",
"driver": "wildfhir",
Now for links as mentioned before this is where you will want to provide your Guided Resource Links.
For WildFHIR there is a homepage, admin page, and the FHIR base url.
"links": [
        {
            "name": "WildFHIR Homepage",
            "url": "http://localhost:8080"
        },
        {
            "name": "WildFHIR Admin",
            "url": "http://localhost:9990/console/index.html"
        },
        {
            "name": "WildFHIR Base URL",
            "url": "http://localhost:8080/r4"
        }
],
Finally what FHIR bundles your will want to include listed in the correct order.
"data": [
        {
            "file": "WildHospitalInformation.json",
            "load": true,
            "name": "Organization Bundle 1",
            "description": "default",
            "type": "Organization Bundle"
        },
        {
            "file": "WildPractitionerInformation.json",
            "load": true,
            "name": "Practioner Bundle 1",
            "description": "default",
            "type": "Practitioner Bundle"
        },
        {
            "file": "Patient 1 - John Doe1.json",
            "load": true,
            "name": "Patient 1 - John Doe1",
            "description": "default",
            "type": "Patient Bundle"
        }
]
You now have all the compotes needed for your stack.json file. If you have not already include the FHIR bundles mentioned in your data section in the public folder. Now you are ready to build the docker image.
Building and Running Your Own Image Configuration
The following docker command can be used to start your build.
docker buildx build -t preston/wildfhir-stack:latest --load .Than you will want to run your image by using the following command.
docker run -d -p 4200:80 preston/wildfhir-stack:latestYour now have your own Stack Controller running on port 4200 (http://localhost:4200)
As long as you have your FHIR server running you can interact with it using the Stack Controller you just created. You will see something similar to the UI below:
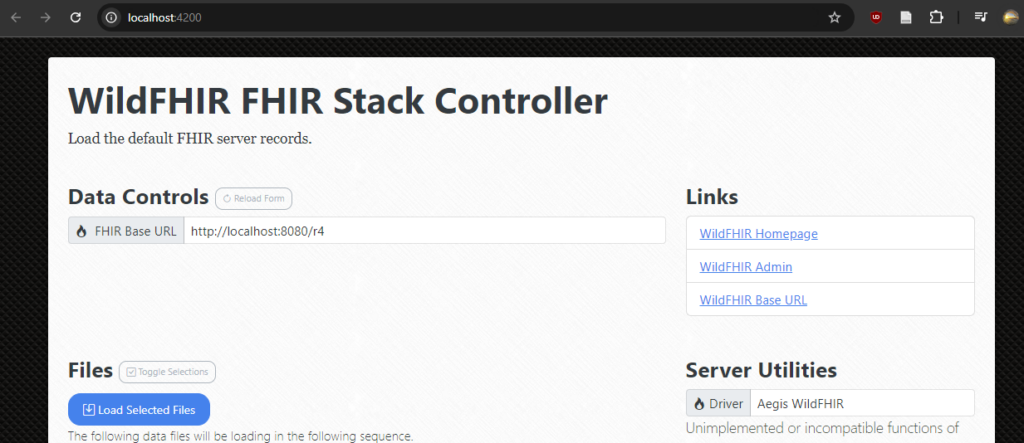
Now you are able to purge and load FHIR Bundles easy!
How to Reset FHIR Server
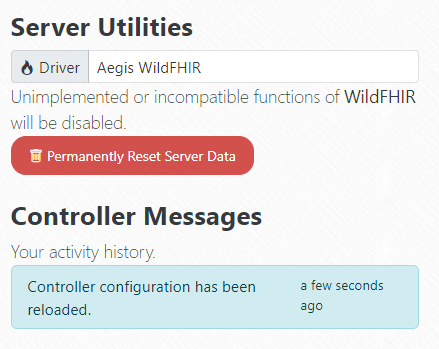
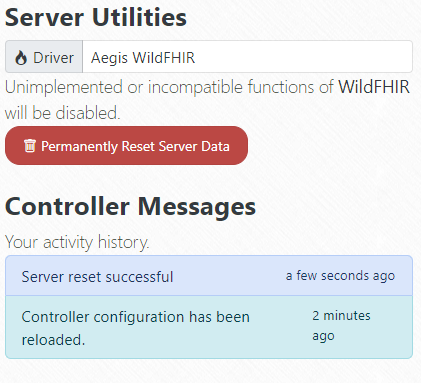
To delete and reset the server you will click the red “Permanently Reset Server Data” button. You will than get a response of Server reset successful.
You now need to load the FHIR bundles by click the blue “Load Selected Files” button. Once the files are done importing you will see a message “Complete. Please check for errors.”.
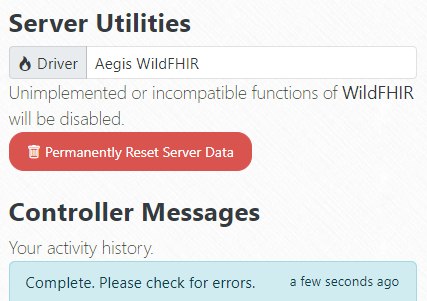
You have now successfully reset your FHIR server!